How to Publish Your Code to Github?
Git is a version control system. It is designed to handle large projects with many contributors.
Now assuming you're going to ad a new feature to the current application. But by hook or by crook you screw it up. The whole application is not running anymore.
What could you do?
Without version control, you will have to reverse all the code you have written. That’s assuming you keep in mind what you wrote.
With version control, you could cross again to the working version with an easy command.
Git is one of the most popular version control systems.
Setting Up Git in Your Project Root Directory
First step is to initialise git in your project. To do this you need to type the following command in your terminal:
git init
This command will initialise an empty git folder in your project.
Then the next command is to add your local changed files in commit by typing the following command:
git add .
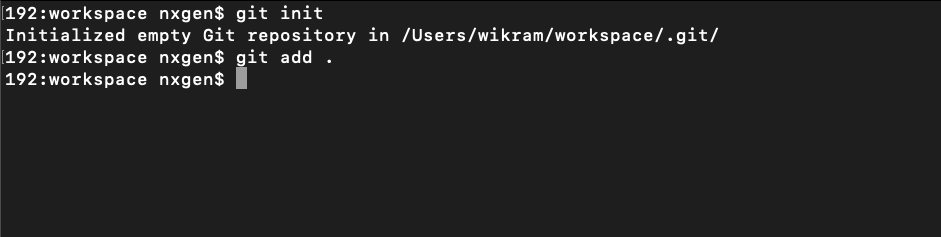
Remember the dot ( . ) after the word add here. That dot represents everything, meaning you want to add all the files in this folder to be committed which have been changed.
After doing this you can check the status of project files which have been added earlier with the following command:
git status
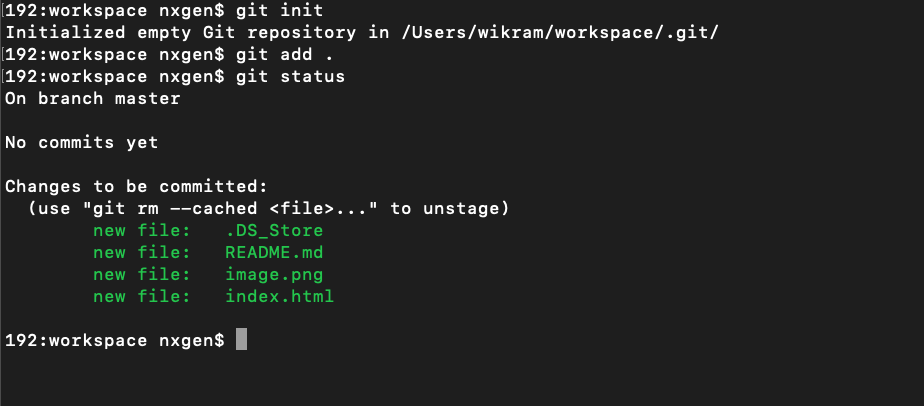
You can see that the Git recognises there are 4 new files under “Changes to be committed:”
To commit your changes to Git you need to run the following command:
git commit -m “Initial commit”

Here “Initial commit” is the message for commit to recognise this commit.
Usually, the message is something that you have done in this commit.
To commit the files means that you want to add these changes in your Git repository. Here“-m” represents the message required for the commit and “Initial commit” is the message to recognise this commit. Usually, the message is something about what changes have been made in this commit.
At this stage you have set up a version control system in your development project.
Pushing Your Code to Remote Repository
Remote Repository means your live Github repository which is not stored in your computer.
After completing the above steps you have set up the git environment in your local computer now the major part is to publish your local changes on Github.
Note: Make sure you have logged in from your account with Github first.
Don’t worry I have also mentioned that How you can do it:
Step 1: Create a new Repository on Github

Step 2: Name your Repository
Give a proper name to your repository to recognise it and a fair description. Choose “Public” or “Private” it is completely up to you. Then click on “Create Repository”

Step 3: Copy the repository link
Copy the repository link to add it in your project as shown in the image:
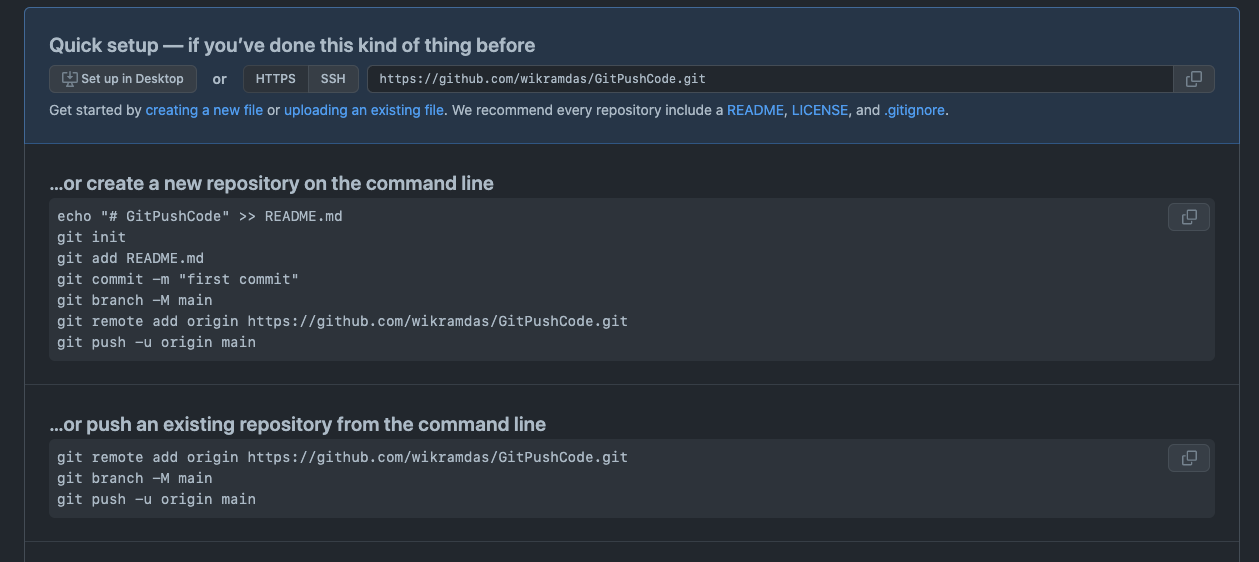
In my case it is:
https://github.com/wikramdas/GitPushCode.git
You will have your own unique repository URL. So do not copy the above mentioned URL.
Step 4: Paste URL in your Workspace
Paste the copied URL in your command/terminal to add it in your project development environment.
git remote add origin https://github.com/wikramdas/GitPushCode.git

Step 5: Push to Github
Now it is time to push the code to your remote branch by typing the following command in terminal
git push -u origin master
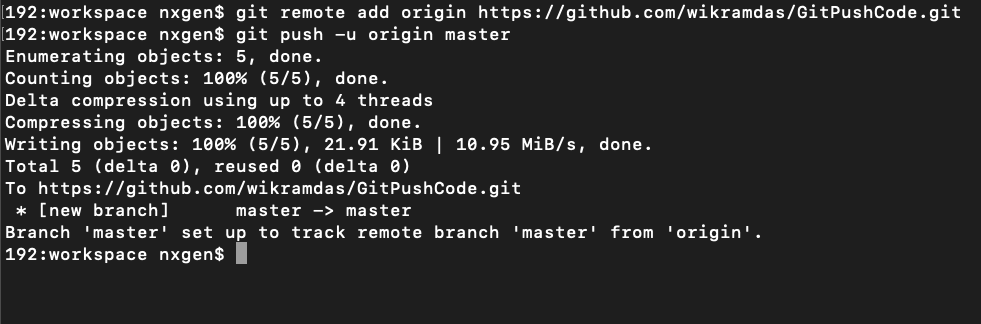
Here “master” is the branch name of your remote repository. You can create multiple branches for your repository and can manage separately.
You may have to enter your Github Username and Password if you did not log in before.
Now go back to your Github repository to confirm the code has been pushed to your remote branch.
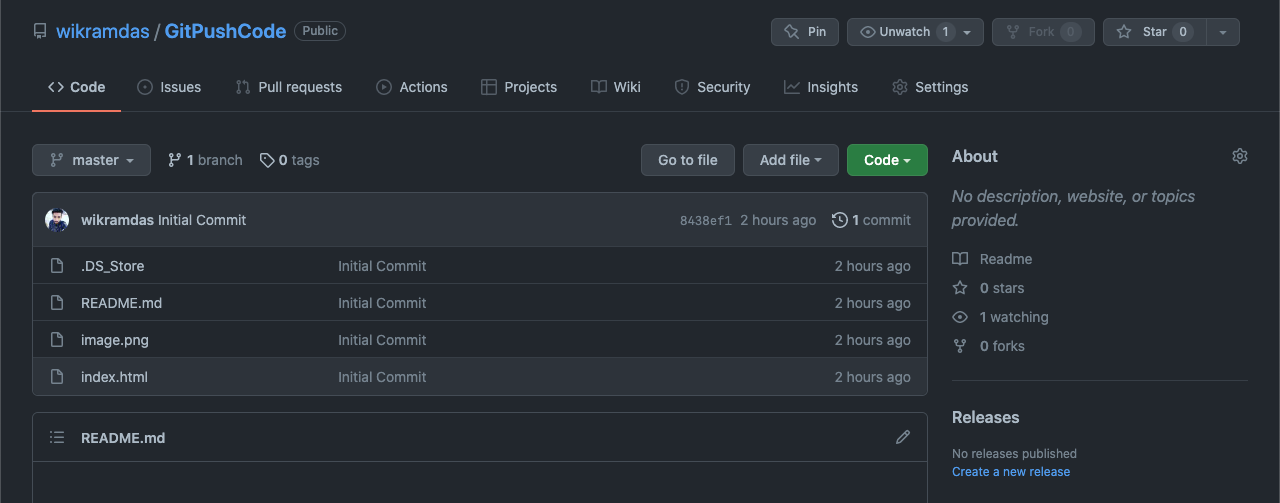
You can see the above image, code has been pushed to remote repository.
Publishing Your Page
GitHub provides you the flexibility to publish your page with them with a live URL.
To do that follow the below steps:
Go to your remote repository and then click on Settings and scroll down until you see the Github Pages section. There you can find the given text:
Pages settings now has its own dedicated tab! Check it out here!

Select “master branch” and click on save.

You will find a URL presented to you. Click on that link. Then you will see your HTML page has been published on the web.

React & React Native Developer

tags .

